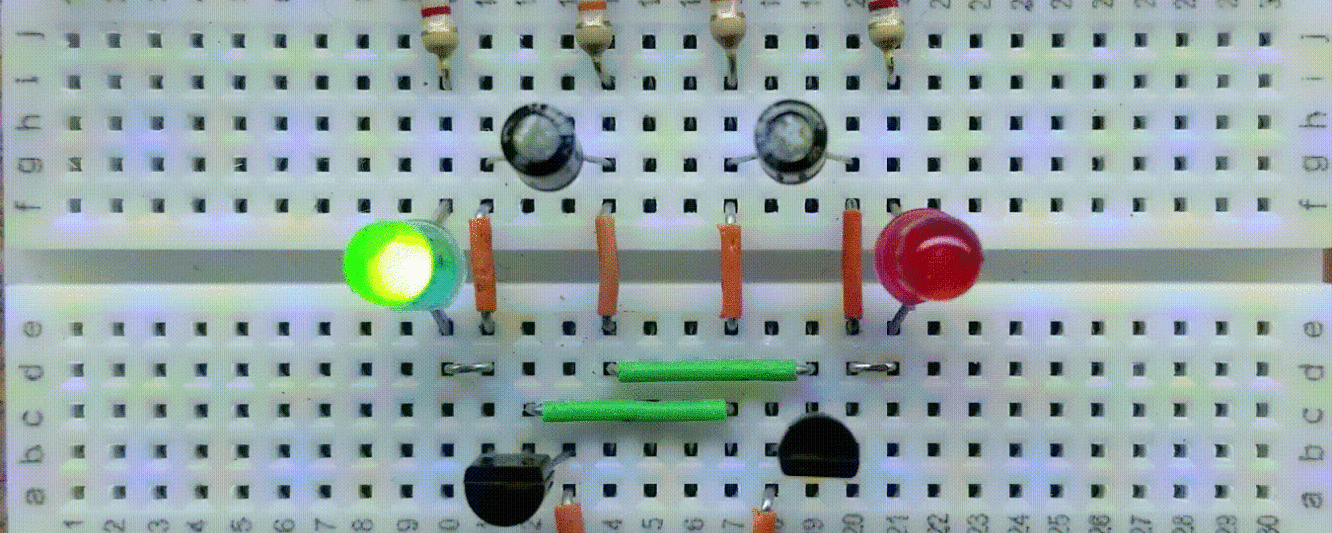
What is a Constant Current Source?
The constant current source is a an important function in not only practical electronics, but also in circuit analysis. It provides a constant current regardless of the voltage drop that appears across it. This is also referred to as an “independent” current source. This is differentiated from a “dependent” current source, which has a voltage drop across it or another part of the circuit, that varies with current. An example of this would be a resistor, the voltage drop of which increases with increasing current.
Why is a Constant Current Source Useful?
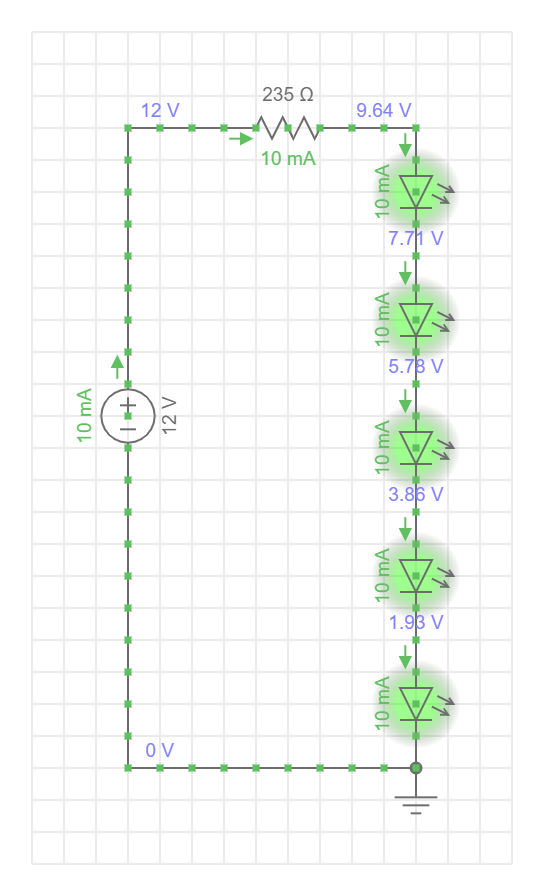
Suppose you have 5 LEDs in series – and you want 10mA of current to flow through them with a power supply of 12v DC. If using just a current limiting resistor, you’ll subtract the LED voltage drops, and divide the remaining voltage across the current liming resistor by 10mA. This will give you the value of the resistor – which comes out to 235 ohms. This circuit is shown below.
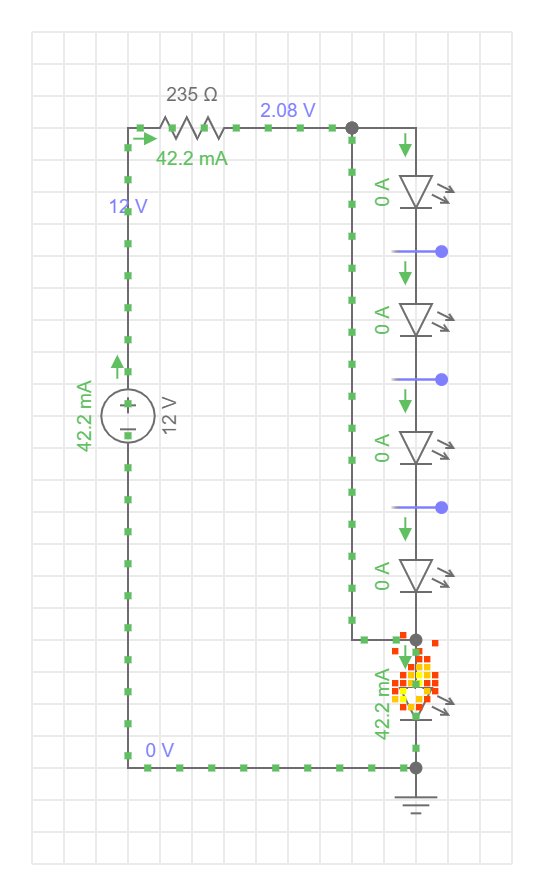
You now have 5 LEDs with 10mA of current flowing through them. Suppose now that you cut 4 LEDs out of the circuit by shorting across them. This would leave one LED with a current limiting resistor that is much too low in value for the circuit. Now you have one LED with 42 mA passing through it as shown in the picture below. This LED will quickly burn out because the current limiting resistor along with the 12V supply is a “dependent” current source – meaning that the current depends on the voltage across that resistor – which has greatly increased because 4 of the LED that were dropping much of the circuit voltage, are no longer in the circuit. That series voltage must appear somewhere – and has no choice to do so across that resistor. If you increase the voltage across a resistor, current through that resistor and consequently, the rest of the circuit – increases.
The answer to the problem is a constant current source – because you want 10mA to flow no matter what. The following circuit will source 10mA through the circuit regardless of how many LEDs are present.
Example Constant Current Source Circuit
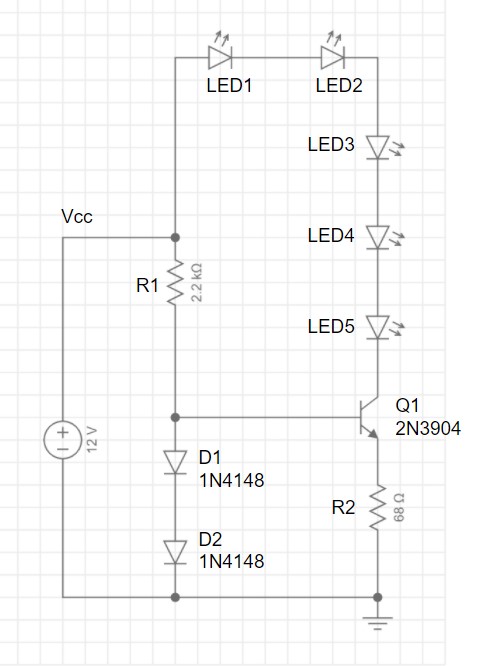
In this section, we’ll design and build an NPN transistor constant current source that will supply 10mA of current through 5 LEDs with a 12v supply. Since the load is placed on the “high-side” of the circuit, this can also be referred to as a “current sink”.
Parts Needed (if you’d like to build this circuit)
- Minimum breadboarding equipment (see here)
- (5) General purpose LEDs
- (1) 1/4 watt resistor kit (see here)
- (1) 2n3904 general purpose NPN transistor
- (2) 1n4148 switching diodes
Breadboarded Circuit
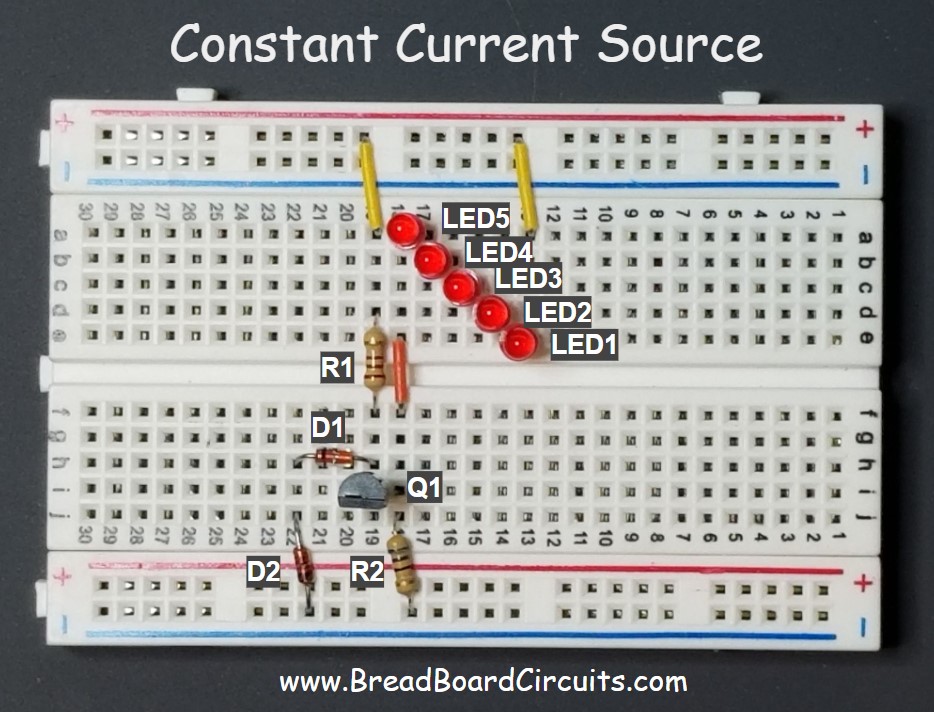
Schematic Diagram
Circuit Description/Analysis
In this circuit, the key to maintaining a constant current is to maintain a constant voltage across R2 – since it is in series with the load (the LEDs). If you can maintain a constant voltage across R2, the current through it, transistor Q1, and the load, will remain constant.
This is accomplished by using the two diodes connected to its base. They will maintain a constant 1.4 volts at the base. Since the base to emitter voltage is 0.7 volts, all you need to do is subtract 0.7 from 1.4 and you have 0.7 volts across R2. The desired constant current is 10mA for the LEDs. Thus we selected commonly available 68 ohm resistor. According to Ohm’s law, the 0.7 volts / 68 ohms is approximately 10mA. If you were to reduce the number of LEDs (or remove all of them and replace them with a wire), you would reduce the total voltage drop of the load. The circuit compensates for this by increasing the voltage drop across the transistor (emitter-collector), as necessary, in an effort to maintain a constant voltage across R2 and consequently – a constant current through R2.
Circuit Demonstration
As shown, the current through the five LEDs is close to 10mA. The actual current will depend primarily on the true forward voltage drop the both the diodes and the base-emitter junction of the transistor. If the current is too far off, you can measure the emitter voltage to ground, and divide that by the desired current to find a better emitter resistor value.
Now if we short out any of the LEDs (or all of them), you can see that the current through the load is maintained at close to 10mA.
Please see the matching video for this article on our Youtube Channel below.
Summary
A constant current source has many uses. The one in this article is a simple circuit consisting of a few discrete components. The transistor’s collector current is determined by the emitter current. The emitter current is maintained by the fact that the emitter to ground voltage must remain constant. This constant voltage appears across resistor R2, which keeps the current through R2 constant. The currant through R2 is approximately equal to the load current – thus the load current is maintained.
For a better experience building breadboarded circuits, please see our page detailing the minimum recommended lab equipment for your electronics bench. Also, don’t forget to review the recommended safety procedures to follow when building and testing breadboarded circuits.
Finally, for other interesting breadboarded circuits please visit the home page here or our YouTube channel here. SM
We are a participant in the Amazon Services LLC Associates Program, an affiliate advertising program designed to provide a means for us to earn fees by linking to Amazon.com and affiliated sites.
